

Firstly, can I just say I never imagined photographing
myself in my pajamas and then posting said photos to the internet. But, then
again, I’ve never had pajamas as snazzy as this. My prior sleeping attire
consisted almost entirely of band tee shirts. So it was very exciting when
Heather released her Carolyn Pajama pattern, and excellent timing as I’d
just moved to Wellington, which has a decidedly colder climate than I’m used
to, and requires warmer sleepwear.

Pattern
I love this pattern. I like the different options it gives,
and it’s classic with a really nice shape to it.
And then there’s the piping! Phwoar!
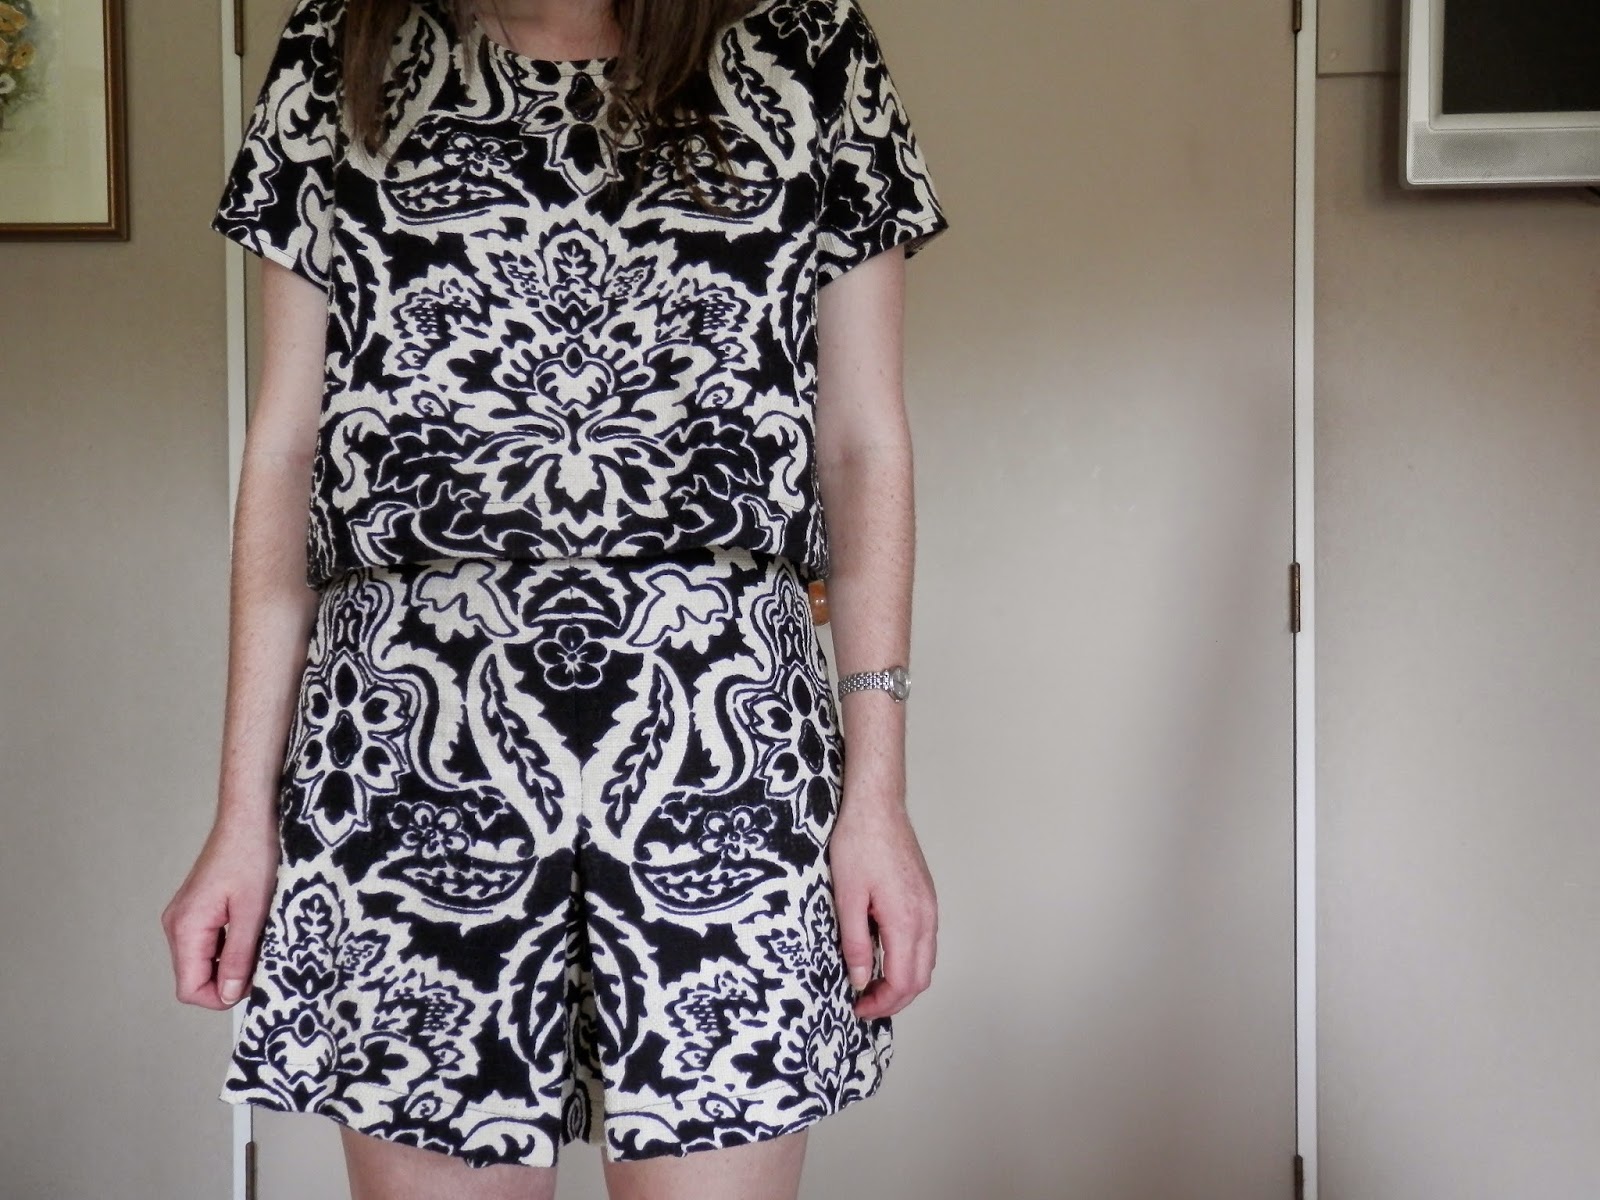
I chose to make the long sleeved top with shorts and I’m
tempted to also make a matching pair of pants for when it gets colder.
I found the pattern to run a little on the small side, but
to be fair I do have a peculiar pear-shaped body. I used the measurement chart
and cut the top in a size 6 and initially cut out the shorts pattern in a size
8. I made the top up first and it fitted nicely across the shoulder but was a
little tight across the hips so I narrowed the seam to 5mm from the waist to
hem on the side seams. I then got a little nervous about using an 8 for the
shorts so recut the pattern as a size 12. When I made these up they were a bit tight
so I narrowed the seams as much as possible at the side, centre back, and
crotch seams. They’re still a little more snug than I’d like but I’m pretty happy
with the fit.

Other alterations I made were to lengthen the shorts by 1cm
and I added piping to the pocket edge. I’m still tossing up about whether or
not to add three buttons to the faux fly (read: I will when I can be bothered).
I toyed with shortening the cuffs as they cover most of my
hands, but I’m glad I didn’t. They’ve got a cosy pajama vibe. However, if I was
to make an outside-wear version I think I would shorten them.

Sewing
This was my first time working with piping and I’m really
pleased with the results. I ended up making around six metres of piping, which
involved a few fabric strips cut on the bias (not fun) and initially my
stitching line was miles from the piping cord. Once I stitched it to the fabric
however, it came out ok. There are a couple of places where it’s not totally
pucker-free but it’s not really noticeable.
The topstitching around the piping looks pretty puckered and
a bit shonky in these photos but I’m attributing that to that fact they’d just
come out of the dryer when I took these photos and they may have shrunk
slightly. I’ve since worn them and they’ve gone back to normal!

Fabric
The fabric is an almost-brushed cotton from the Fabric Store. I snapped it up when they had 50% off so I think it was down to $10 a
metre. It’s lovely and warm and I love navy so it was ideal for my needs. I
looked at white piping but in the end decided on pink. I got the piping fabric
and cord from Spotlight. The fabric is a cheap poly satin but it keeps snagging
on everything so next time I might go with a cotton for the piping.

Next time:
-
I will go up a size for the shorts and add 1cm onto
the side seam of the top so the fit is spot on
-
Lengthen the shorts by a centimetre or two
-
Maybe raise the top buttonhole by an inch. I
have no bust to speak of so the neckline's a little low for me (and yes, I should
have checked this before sewing my buttonholes)
-
I considered monogramming my initials onto the
pockets in pink after I made the top up. I decided against it though, because I
thought it may look a bit cramped with the pocket being split into two parts. Next
time I’ll omit the piping and maybe have it along the outside of the pocket
instead to frame the monogramming.
-
When summer next rolls around - in approximately
nine whole months - I’m definitely
making a silk pair. Pale pink with navy piping? Printed crepe de chine? I’m
getting excited already...

Wearability
I desperately need another pair already so I can stop
wearing these so often! They’re lovely and warm and look too nice to just be
wearing to bed. I’m certainly tempted by Heather’s suggestion to make a silk
set for outside wear. Or I was thinking of making the collar point a bit more
square to lessen to pajama connotations and making the top into a blouse.
Either way, this project has made me realise I need more piping in my life! I
am a little worried I’ll end up looking like an extra in a cowboy movie. I
guess white with black piping is a good start? And omitting any fringing and
yoke will certainly help!
As a coincidence, a few days after I finished my pair, I
stumbled across this set from NZ label Lonely Hearts. They are amazing but
cost a small fortune ($415). Admittedly, I felt rather smug when I totalled mine
at a mere $35 (yay for handmade stuff and the $$ saved). I may just keep a
sneaky eye out for a similar floral print for the future though, it makes for
quite a different look.
 |
| Source |
UPDATE: Lonely have done a navy set very similar to mine,
they used cream piping though. In my opinion, their neckline looks a little too
high. (or am I secretly just envious)
Anyway, I guess this means that for once in my life I’m bang
on trend?!


