Showing posts with label Pattern-making. Show all posts

Monday, 30 November 2015

//WHITE COTTON SHIRT


To start with: I need to admit that this shirt came about through the purchase of a fast-fashion, RTW shirt from Topshop.

A few months ago I found myself in desperate need of a white shirt at short notice. After coming to the conclusion that it wouldn’t be possible to whip one up myself in the timeframe I had, I relented and purchased one from said chain store. While feeling slightly let down with myself (what happened to my no fast fashion goal?) it did set me on a journey of many shirts.

I kind of fell in love with my Topshop shirt. It filled a white-shirt-sized gap I didn’t realise I had in my wardrobe and I wore it frequently. At least until the fabric started pilling six weeks in and it started to look a little sad.

To cut a long story short, I didn’t realise the extent that white shirts (or rather tailored, collared shirts in general) fitted with my style and this has set me on course to creating my own pattern that I can use as a base for a variety of different shirts.


This particular shirt was made straight from the shirt pattern in Winifred Aldrich’s Metric Pattern Cutting. I intended to make up a wearable muslin simply because there’s a fair amount of work involved in sewing a shirt (collar, stand, placket anyone?) and it seemed silly to spend that time on a garment that has no wearability at all. Instead, I thought I’d take my chances and use a proper shirting fabric and hope it turned out wearable in some sense.

And it actually turned out pretty well.


The fabric is a cotton from the Fabric Store, and it’s the perfect weight for what I was wanting. It’s not super thin or flimsy and it crisps up well after a good pressing. It’s also got enough body to hang away from my body and not drape too much.


Pattern

I pretty well followed the pattern instructions in the book, and only made a few adjustments. 

I omitted the yoke as I couldn’t be bothered with one for a muslin and I didn’t think it was all that necessary. There is a little bit of bagging around the shoulders/ back of the neck, but I can’t tell if that’s related to the lack of yoke or a problem with the neckline depth.


I drew my own collar shape, which is slightly pointier than I was intending but I’m still happy with it.

I directly copied the breast pockets from the Topshop garment. I think that most shirts need detail on the front somewhere to add interest and compliment the collar and it looked strange without pockets. This is also helpful in averting any problems with see-through fabric!


I made a pattern for the cuffs, but didn’t end up using it. During the trying-on stage, I decided that the sleeves were too full to be pleated into a cuff without looking puffy and unflattering , and to be happy with them I would have to draft a slimmer sleeve. However, I really liked the look of them uncuffed and at the length that they were, so I set about doing a super narrow hem to keep them this way. I think this adds a real point of difference to most of the RTW shirts I’ve seen and the sleeves are one of my favourite parts of the shirt.


Sewing

This shirt is one of my first attempts at a decent collar and some tailoring; besides my Alder shirtdress I’ve never really delved much into that side of sewing. I was kind of gung ho when I started this, but it turned out pretty well. I’m not sure I’m doing this tailoring business right, I’m kind of winging it, but I think these skills will improve as I make more shirts.

I decided early on that if I wanted this to pass as a proper garment then French seams were important. I’ve sewn them on a few garments in the past so they were no real issue. While I did have a minor freak out when I thought the sleeves wouldn’t fit into the armscye, a lot of pins helped me realise that they actually would!


Next time

The collar on this shirt is not perfect. I’m happy with the general size of it, but I think I’ll make it with a slightly shallower point next time. It also overlaps by a few millimetres  at the centre front. I think this is down to a double up of seam allowances or something similar when I was tracing the pattern, but it’s easily remedied next time.

Wearability

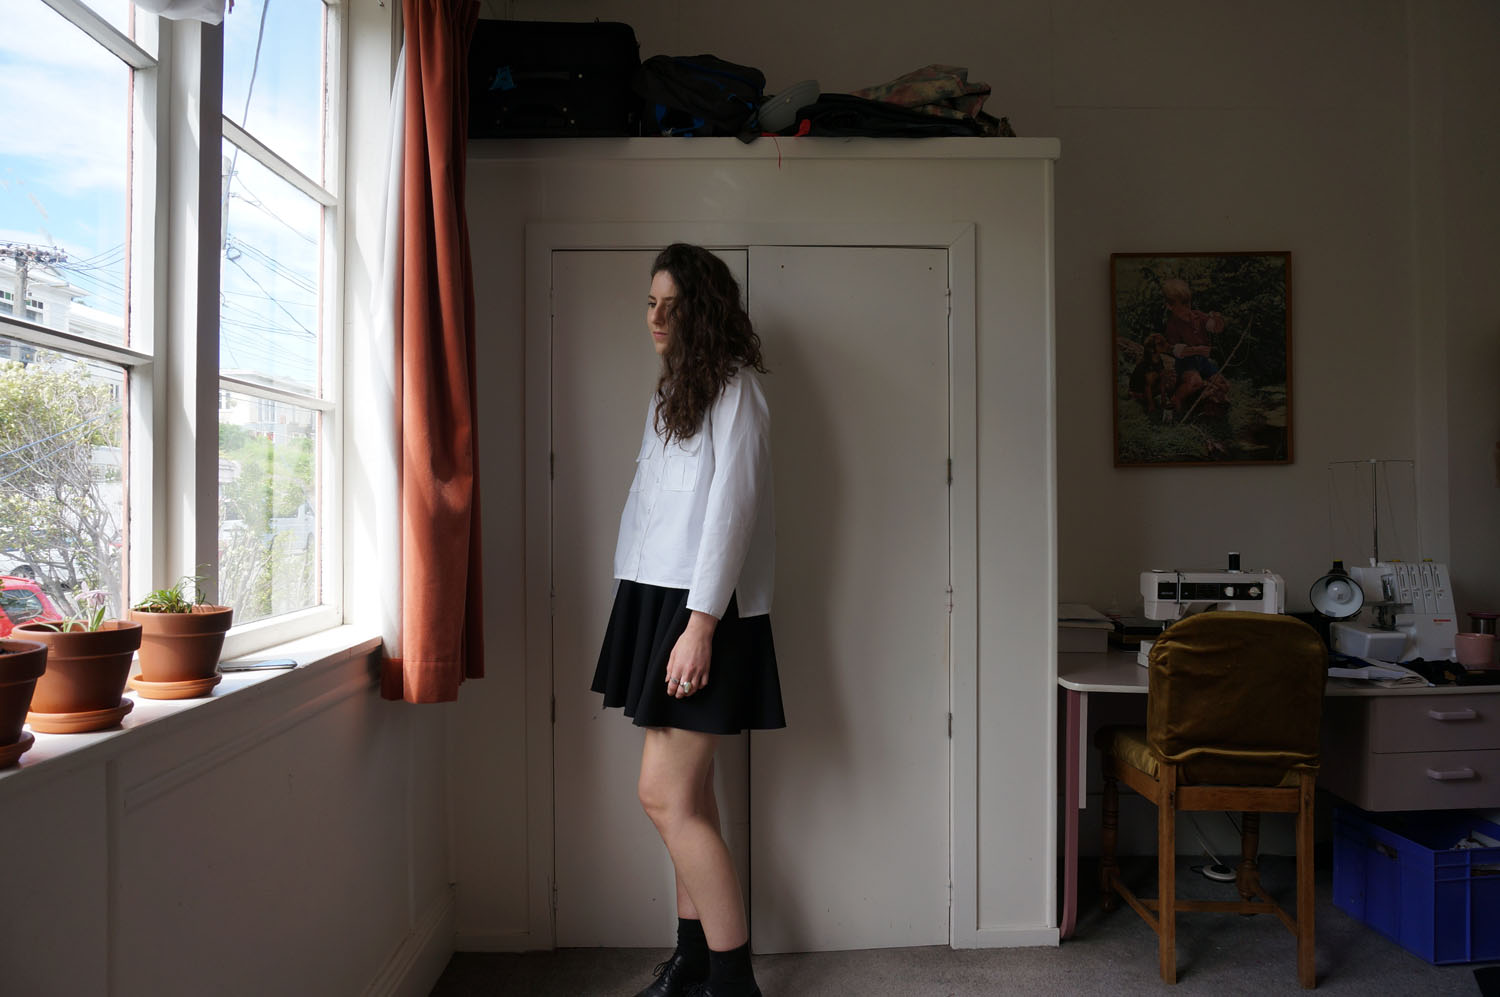
I wear this shirt All. The. Time. It fits in really well into my wardrobe; I usually pair it with culottes or the black skirt pictured above, but it also works well under a corduroy Sway dress I’ve made. It works in that it’s boxy but not so boxy that it bunches up under other layers or jackets. It’s a winner in my books!


A Journey of Many Shirts

As a wearable muslin, I’m pretty happy with this shirt. I’ve since made up a shirt as part of my Spring Summer ’15 plans (here and here) based on this pattern with a few alterations and it’s turned out well. I have a few more shirts planned for my summer sewing and they’ll all have this pattern as a base. I’ve christened this the Journey of Many Shirts.

Until next time!

Monday, 9 November 2015

//SPRING SUMMER '15 PT. 2

6. LINEN COLLARED SHIRT


1. 2. 3.
Twenty-Seven Names is probably my favourite New Zealand label. I really enjoyed the pictures from their recent fashion week show, especially the heavy use of linen and the neutral colour palette. So here’s my take on it; a simple, linen shirt.

I want a collared shirt with full length cuffed sleeves, a sharp collar, and built from a beige/fawn/grey linen or cotton. I haven’t got a lot of linen in my wardrobe but I really enjoy wearing it. It’ll be good for summer and a less formal shirt option.


7. SILK + CONTRAST CO-ORDS


1. 2. 3.
Following on from the proclamation of love in Part 1 for twin-sets, here’s the second one I’ve planned for summer. This one’s going to be a little more ‘going out’ than the first – it’s going to be made from a beautiful black duchess silk satin with a contrast trim. The trim is a tencel from memory – it’s almost a faux reptile/scale look fabric. I want the silk to be the star of the show but feel it might need some accenting.


Pattern-wise, I’m planning on a raglan tee pattern (I have one that I drafted a few months back) and my usual culottes pattern.


8. ORGANZA INSERT SWEATER


This idea is one that’s been knocking around my head for a couple of years. It’s inspired by a Cheap Monday jumper I saw in a Melbourne boutique early last year. In a nutshell: a jumper with organza inserts in the sleeves and waist with ribbed cuffs and neckline. I have all the fabric I need for this but it’s been in planning for so long that it’s hardly top of the to-sew list. It’s one of those really drawn out projects that’ll come into fruition eventually.


9. TEXTURED BOMBER JACKET


1. 2. 3.
This is again a case of snapping up amazing fabric and matching it to a good pattern. I picked up some great textured wool/metallic fabric (here’s a pic) from the Fabric Store in one of their big sales and pretty quickly earmarked it as a bomber jacket. Of course a Rigel bomber jacket. To me the fabric was destined to be a jacket because of its weight and thickness, but it can look a little dull from a distance, so I’ve gone with a modern shape to counter this.


10. LIBERTY COTTON PAJAMAS


1. 2. 3.

Aside from shirts, shorts, and dresses, I think every summer wardrobe needs some decent sleepwear! I was completely ecstatic with my first pair of Carolyn Pajamas so I’ve planned a summer set. I picked up some Liberty lawn (this design) when I was in London and it’s intended for a lightweight piped pair. Still tossing up between white or navy piping.


11. KNOT DRESS/JUMPSUIT


While these ideas aren’t all that likely to be realised given my sewing schedule, I’d also like to work a bit more with the knot dress pattern I made last year, and make it up in another fabric (denim? Sateen? Chambray?) or turn it into a jumpsuit. I’ve pretended the dress is a jumpsuit in the mirror more than once (who else does this with their dresses??) and it looks really cool, so if I have any spare sewing time this is an option.


/OTHER CONTENDERS


I haven’t made any solid plans for it, but I suspect at some stage I’ll whizz up a sway dress or two in a chambray or denim. I’ve made this pattern up a few times in corduroy and it’s great (and perfect for summer).

Also, while I’ve been pretty successful at ignoring them, there is a small pile of ufos that needs some attention. Ahem.


//


So there you have it. My sewing plans for the hot seasons. I can't promise these will all get completed as I change my sewing list priorities often but they're currently front and centre of my sewing thoughts. I have completed one of the shirts from the Part 1 post and am currently working on the bomber jacket in this post so I am making progress!

Until next time...

Friday, 30 October 2015

//SPRING SUMMER '15 PT. 1

Better late than never right?! Yes, spring is two-thirds gone and yes, there’s only four more months until Autumn (a bleak thought), but here’s part one of my inspiration and sewing plans for the hot seasons. I’ve been loving the seasonal sewing plans popping up and thought I’d get involved, starting with my Pinterest. I’m also hoping that by putting my ideas and plans on here I’ll be more compelled to try and get them finished and cross them off the list. I’m somewhat doubtful that I’ll sew all of these garments, as I’m terrible (or good?) at bumping new ideas and patterns up the to-sew list, but they’re certainly a good starting point and give me something to aim for.

Without further ado  . . .

1. CONTRAST POCKET COTTON SHIRT


1. 2. 3. 4.
I’ve recently re-discovered collared shirts and I’m loving them. I instantly feel ten times more put together once I put one on so I’m planning on making a few for the spring/summer. I made up a white cotton shirt using Winifred Aldrich’s Metric Pattern Cutting book a couple of weeks ago and it turned out really well. It was a bit more full in the sleeves than I liked so I omitted the cuffs to save it from being too puffy (I’ll deal with mastering cuffs later in the season).


I’m planning to use this pattern to make a cropped cotton shirt but with contrasting pockets so it’s a little different. I have a small amount of this purple leather stashed away which is a contender for the pockets but I could also just use a patterned fabric depending on the weight of the cotton I end up using. I’m planning a crisp collar and a boxy shape.


2. A-LINE CORDUROY SKIRT


1. 2. 3.
Do I even need to explain the inspiration behind this? Ever since Alexa Chung released that collection of denim minis and A-lines, button-up skirts seem to be in the window of every high street shop I walk past, so I guess I’m just jumping on the bandwagon. In truth, I brought this mustard corduroy at the start of the year and earmarked it for something 70s-ish. (Obviously. What else does one use mustard corduroy for?? ). I had in mind a plain A-line with an exposed metal zip, but I like the look of buttons/domes so I’ll go with that.

To ensure it’s not too run-of-the-mill I might jazz it up a bit by putting the buttons off centre or adding contrast panels to the sides (I have some matching aubergine corduroy in my stash).

I have a self-made pattern that I could easily alter to use for this but the release of Pauline Alice’s Rosari skirt pattern recently seemed like a sign, and it’ll save time fiddling around trying to perfect my one.


3. TWIN-SET WITH SKORT


1. 2. 3.
Twin-sets. Matching separates. Co-ords. Whatever you want to call them, you have to agree they are pretty good. I made my first set around a year ago and I’ve made two or three since then. This one is probably my favourite. The idea behind this outfit is more about showcasing the fabric than using the fabric as a means to realise the design’s shape and form.

When I saw this fabric at the Fabric Store I immediately fell in love with it and snapped up the last 1.3 metres. It’s lovely and textured and I decided almost as soon as I brought it to make it into a twin set because there’s not enough fabric to do too much with it. I also considered a Rigel bomber but wanted to do something a bit different. I’m intending to do the bottoms up as a skort. I often make culottes as I’m pleased with the pattern I have, but want to mix it up a bit, so I’m going to use this pattern and put a faux wrap layer on top.


4. DOTTED CROPPED BLOUSE

1. 2. 3.
This next idea was also primarily inspired by the fabric. I saw this dotty linen/cotton at the Fabric Store and couldn’t picture it as anything besides a collared shirt. I’m not certain how I want the hemline to be yet, I’ll make it up and then decide, but I’m going for a boxy shape with loose sleeves for those hot summer days!


5. HIGH-WAISTED PLEATED SHORTS


1. 2.
Every summer wardrobe needs a decent pair of shorts and here’s my intended pair. I’m into high-waisted things (as they suit my body shape best) but nothing too tight-fitting so I figured that the pleated, safari short is my best bet. I’m initially after a black pair as they’ll fit best into my wardrobe, and depending on how those turn out I will probably end up with a denim pair too. Fabric-wise, I’m tossing up between a soft black denim or a thick-ish sateen. Either way I’m thinking cotton with a bit of body.


Wednesday, 11 February 2015

//LINEN TWO PIECE SET-ACULAR

Hi everyone!

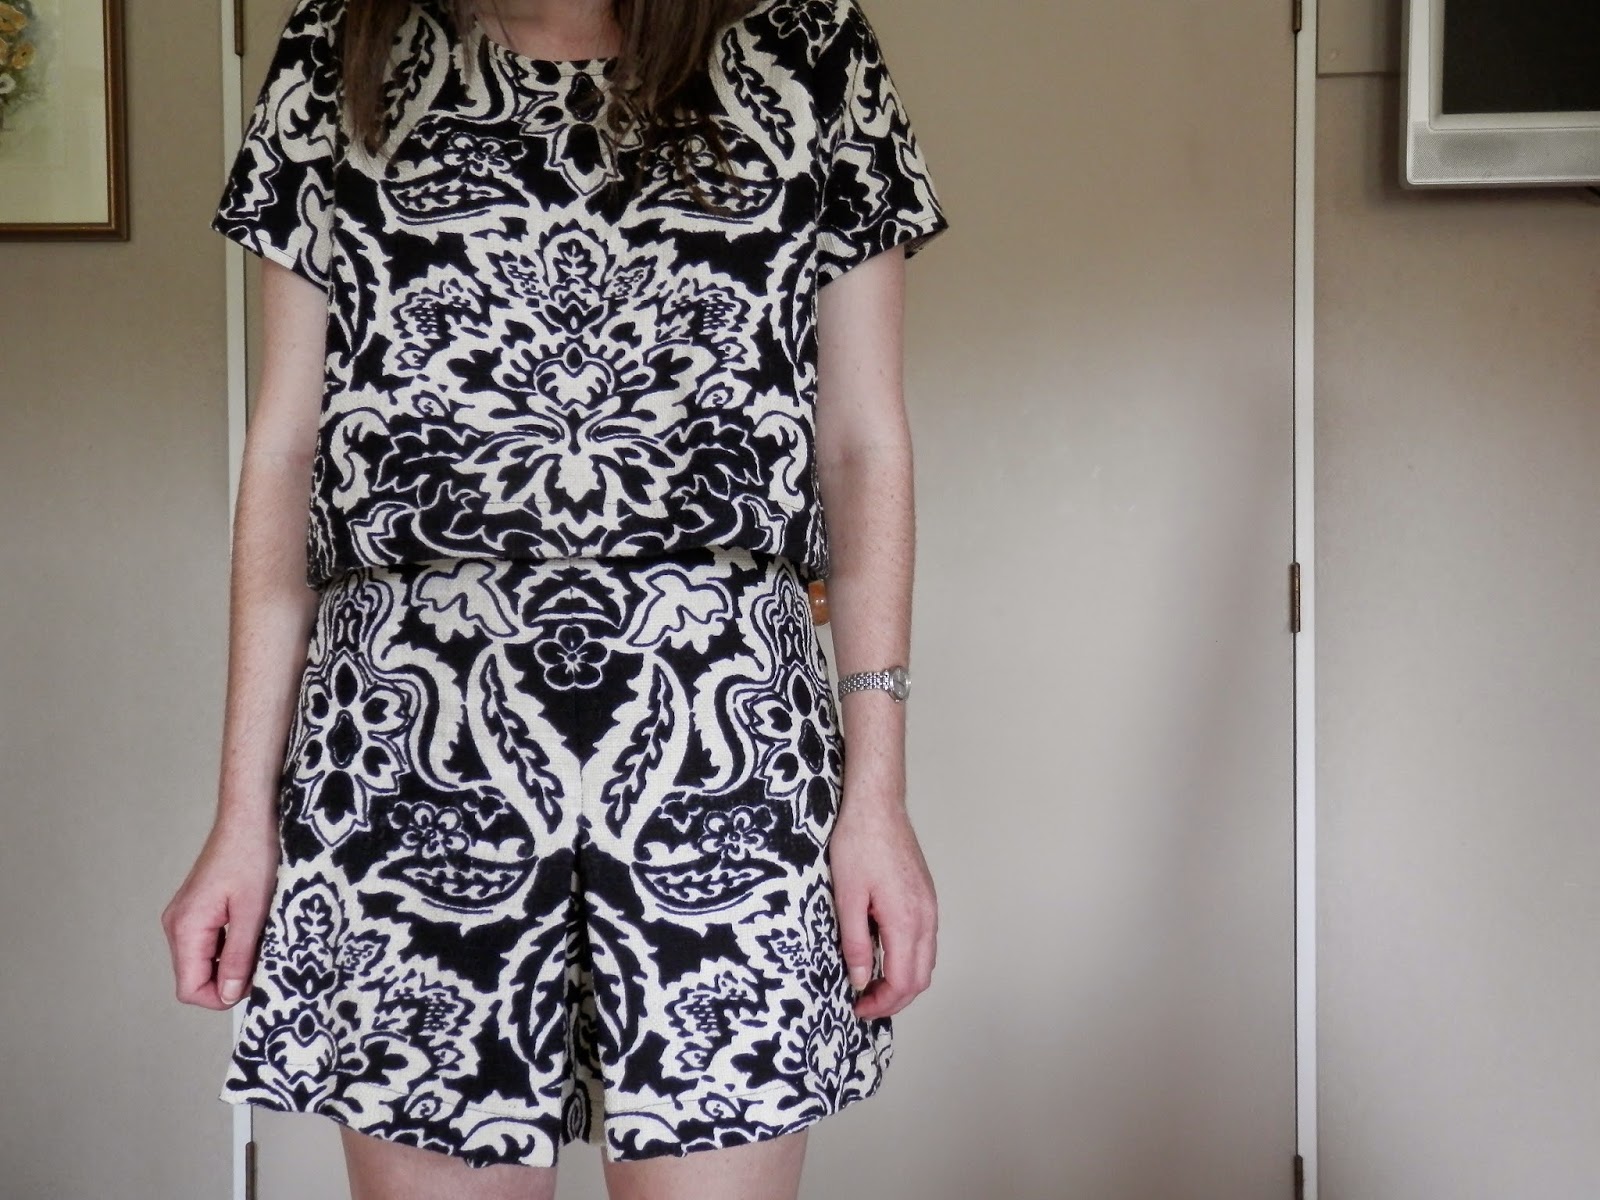
May I present to you my VISUALLY LOUD TWO-PIECE.

I was totally enamoured with Sophie’s two piece outfits last year as well as all the fab ones she inspired. So here’s my addition to the Two-Piece Set-Acular club! Better late than never, right?!


Fabric

This fabric is amazing. It’s a thick-ish textured linen-cotton mix from the Fabric Store.  It’s incredibly comfortable to wear and just the right combination of soft and thick. The cotton content has more or less eliminated crinkles.

Then there’s the fabric’s  pattern - which can speak for itself (and in quite a loud voice!). My favourite twin-sets to come out of Sophie’s campaign were the patterned, bright ones. (I made another twin-set a few weeks ago from a plain navy linen but it’s just not as effective - it’s missing some ‘oomph’.) 

I got this particular linen about a month ago in some mail samples for another project, but it wasn’t right for that project. The idea of a twin set recently re-entered my consciousness and, hey presto, it was perfect.

In hindsight  - perfect twin-set fabric . Now all I want is this weight and texture in solid colours .


Pattern matching

I was wary of being swamped by the busy pattern, so from the outset decided to position my pattern symmetrically to add a focal point to the garments . I ensured that I cut each piece of the front and back of the shorts as a mirror image of the other front or back piece – that way when I sewed the pleat in the middle of the culottes it would match! However, had I been concentrating a bit more carefully I would have matched the side seams. I got distracted by the whole mirror image thing and didn’t realise that I could easily have cut the front and back identically so it matched at the sides as well! 

Ahh well, I guess pattern matching does that to you.


Pattern

The top pattern is Grainline Studio’s scout tee. I’ve made heaps of these and haven’t made any major adjustments to the pattern. For this I just cropped it and raised the neckline by 1cm.
The bottoms are a pair of culottes of my own pattern. It’s based on a culottes pattern in Winifred Aldrich’s book Metric Pattern Cutting which turns the skirt block into shorts and adds fullness to the front of the pattern - which is pleated to hide the short legs and make it look like a skirt. I’ve made this pattern a few times over summer and I’m quite fond of it. I’m not much of a shorts girl and culottes are a good compromise for me. I’m still quite unsure whether or not it’s a flattering shape for me but I’ve entered a culottes phase and there’s no turning back!


Sewing

This was lovely fabric to work with. I’ve made both the top and culottes before so whizzed through the sewing of them. I think all up it took me around a day of sewing to put together.

Yay vs nay

Yay

  • The fabric! Say no more
  • I think my pattern matching/making it symmetric worked well and draws the eye
  • I can wear both pieces with other (plain) garments without it looking strange – I can either go full pattern or wear it by halves.

Nay

  • There's been no real negatives in my wearing so far!


Wearability

This is a fun outfit to wear!

I lived in it for the first week after I made it, until I realised that the loud nature of the fabric made it pretty obvious to people the frequency I was wearing it! It’s super comfortable, and the fabric holds its shape nicely without being stiff. It is relatively warm given its thickness but it’s a nice fabric to have against the skin - yay for natural fibres!

It is a bit of a change for me to wear such a bold pattern, particularly a whole outfit of it, but I’m finding black and white a good place to start. I’ve just finished another twin-set - a pastel floral number - and I keep visualising what else I can turn into a twin-set from my stash.


Twin-set ideas

I delved deep into the world of twin-sets (and by that I mean Pintrest) when I was looking for ideas re pattern and shape, and here's some of my favourites:

How good is that Kirsten Dunst one?!?
Source: all from Pintrest


So many great ideas!
Source: all from 
Pintrest
More over on my Pintrest

I'm now scheming about all the different variations I could do - winter, summer, pastel, trimmed, tailored, a blazer - so I guess have the twin-set bug!

Monday, 12 January 2015

//PATTERN MAGIC KNOT DRESS


One day last November I was perusing the sewing section of my local library when I came across Tomoko Nakamichi’s Pattern Magic. I’d seen this book reviewed here and there on the internet, and while the diagrams looked somewhat intimidating I got it out anyway.

The ‘Knot dress’ (I prefer ‘bow') immediately stood out to me; it was something I would actually wear, as opposed to some of the more, er, avant garde designs in the book.

And so this dress was born!


Pattern

This pattern was actually pretty simple once I read through the book and familiarised myself with the diagrams and what they actually meant. I’d assumed that I would have to use my own block until I saw the one at the back of the book which I photocopied and traced. This essentially made the whole process patternmaking-by-numbers if you will; starting with their block and moving the lines a few centimetres at certain points, and extending these lines out into a dress length.
The bodice was slash and spread to create space for the tube which the bow is tied from. It was a little fiddly trying to make the gaps even and then trace around them.

I stuck to the pattern in the book except for a few changes:

  1. I added around 3cm to the length of the bow tube
  2. I didn’t add the small pleats at the back of the dress as I thought it would be better without
  3. I shortened the length to one I’m more comfortable with (I think I took off around 10cms)
  4. I straightened the bottom hem
  5. Once I put the dress on I decided to take some fabric out of the sides as it was a bit billowy for my liking. I think I took off around 7cms from each side, which gave it a more A-line shape.

Pleat-less back of the dress

Sewing

The instructions in the book for sewing the dress consist of literally one line:
“Sew the bow section into a tubular shape up to point c”
This left me slightly confused. A bit of playing around and this explanation helped. The base of the tube has a tricky curve to get around and I handsewed this together first as it looked impossible to do with only pins, machine stitched it, and then I was away! The rest of the dress was pretty straightforward to put together.


Exposed zip and shoulder darts

Finishing

I used some binding I’d made a while ago for the armholes and neckline, and an old zip I had lying around for an exposed zip at the back. For the hem, I overlocked the edge, folded it up 3.5cms and stitched it. I didn’t want to add any stiffness by double folding the hem.

Yay vs Nay

Yay

  • The shape of the dress is really flattering. The bow over the bust adds detail while the rest of the dress skims the hips and comes out to an A-line shape. The pleat is also handy; it gives extra move-ability and is pretty cute!
  • The biggest yay for me about the dress is the fabric I used. Formerly a $6 duvet cover, I suspect it’s mainly polyester with a little cotton. This was partially intended as wearable muslin but because it turned out so well it’s been upgraded straight to a regular wearable dress! Using a duvet cover for the fabric of this was also really useful because the pattern requires heeeaps of fabric if you opt to have the bow tube all-in-one with the bodice as in the book (as opposed to a separate pattern piece).
My "crisp" bow

Nay

  • My bow came out nothing like the picture in the book. It was limp and sad so I had to tack it in place to keep it looking crisp!
  • I know that Pattern Magic is primarily for patternmaking, but more detailed sewing instructions would have been handy, especially since the sewing method isn’t totally intuitive.
  • The fabric attracts cat hair like metal to a magnet. I’ve had to invest in some sticky lint removers exclusively for this dress!

Wearability

Overall, I'm really happy with how this dress turned out. I wear it relatively often, and the old canbedressedupordown rule applies!


I've made a list of other things I want to make out of the book, including another bow themed top, the intriguing deppari shirt, and another version of this dress in actual dress fabric.